How to Properly Clean and Store Your Makeup Brushes | |
| |
Makeup brushes are essential tools for achieving a flawless and professional makeup application. However, to maintain their performance and ensure healthy skin, regular cleaning and proper storage are crucial. In this comprehensive guide, we will walk you through the step-by-step process of cleaning and storing your makeup brushes, allowing you to keep your tools fresh, hygienic, and in optimal condition. Say goodbye to bacteria buildup and hello to a clean and effective makeup application every time. The Importance of Clean Makeup BrushesClean makeup brushes are essential for several reasons:
Cleaning Your Makeup Brushes Step-by-StepFollow these steps to properly clean your makeup brushes: Step 1: Gather Your SuppliesBefore you begin, gather the necessary supplies:
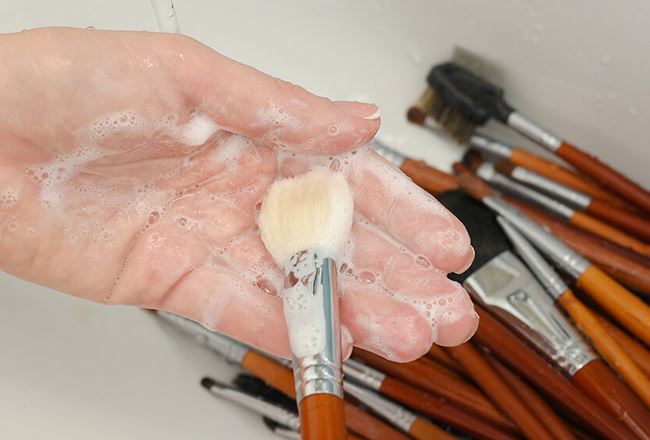
Step 2: Wet the BristlesStart by wetting the bristles of your makeup brush under warm running water. Be careful not to wet the ferrule (the metal part) of the brush, as this can loosen the glue that holds the bristles together. Step 3: Apply Cleanser and LatherPlace a small amount of mild shampoo or brush cleanser into the palm of your hand or a brush cleaning mat/glove. Gently swirl the brush bristles into the cleanser, creating a lather. Ensure that the bristles are thoroughly coated with the cleanser. Step 4: Rinse the BrushRinse the brush under warm water, gently squeezing the bristles from the base to the tips. Continue rinsing until the water runs clear, indicating that all the cleanser and residue have been removed. Step 5: Pat Dry and ReshapeGently squeeze out excess water from the bristles using a clean towel or paper towels. Avoid rubbing the bristles vigorously, as this can damage them. Reshape the bristles to their original shape and fluffiness with your fingers. Step 6: Air DryLay your brushes flat on a clean towel or hang them upside down to air dry. This allows the water to drain away from the bristles and prevents moisture from seeping into the ferrule, which can cause damage or loosening of the bristles. Ensure that the brushes are fully dry before storing or using them again. Storing Your Makeup BrushesProper storage helps protect your makeup brushes and keeps them in optimal condition. Follow these tips for storing your brushes:
FAQs about Cleaning and Storing Makeup BrushesQ: How often should I clean my makeup brushes?A: It's recommended to clean your makeup brushes at least once a week for personal use. If you're a makeup artist or frequently use your brushes, consider cleaning them more often, ideally after each use or every few days. Q: Can I use regular soap or dish soap to clean my brushes?A: It's best to use a mild shampoo or a brush cleanser specifically designed for makeup brushes. Regular soap or dish soap may be too harsh and can strip the bristles of their natural oils, causing them to become dry and brittle. Q: Should I use hot or cold water to clean my brushes?A: Warm water is ideal for cleaning makeup brushes. It helps to break down and remove makeup residue and cleansers effectively. Hot water can damage the bristles and affect the adhesive that holds them together. Q: Can I use a hairdryer to speed up the drying process?A: It's best to avoid using a hairdryer to dry your makeup brushes. The heat can damage the bristles and cause them to become brittle. Allow your brushes to air dry naturally to maintain their shape and quality. Q: How can I sanitize my brushes between cleanings?A: To sanitize your brushes between cleanings, you can use a brush cleaner spray specifically formulated for quick cleaning and disinfection. Simply spritz the brush bristles, gently wipe them on a clean tissue or towel, and allow them to dry before use. Q: Can I clean natural and synthetic brushes in the same way?A: Yes, you can clean both natural and synthetic brushes using the same cleaning method outlined above. However, synthetic brushes tend to be more durable and can withstand slightly firmer cleaning techniques if necessary. ConclusionProperly cleaning and storing your makeup brushes is essential for maintaining their performance, hygiene, and longevity. By incorporating regular cleaning into your beauty routine, you can prevent bacterial buildup, avoid skin irritation, and ensure that your brushes continue to provide flawless makeup application. Follow the step-by-step cleaning process, and store your brushes with care to keep them fresh, hygienic, and ready to elevate your makeup looks with every stroke. | |
| Category: Makeup | |
| Total comments: 0 | |
 |
| The Importance of Scalp Health for Overall Hair Growth |
 |
| How to choose Teeth Whitening Kits |
 |
| The Importance of a Properly Balanced Diet for Healthy Hair |
 |
| Creating a Natural Makeup Look for Work |
 |
| How to choose Hair Removal Device |
 |
| Creating a Flawless Makeup Look for Special Occasions |
 |
| The Benefits of Using Sulfate-Free Shampoos and Conditioners |
 |
| Almond-shaped eyes makeup tips |
 |
| The Benefits of Using Mineral Makeup |
